How to Add AI to Your iOS App in 15 Minutes
Adding AI to an iOS app used to mean writing a backend, managing API keys, figuring out authentication, and wiring up a Swift networking layer to call it all. It was a weekend project at minimum.
With the MAIG iOS SDK, you get it done in 15 minutes. Here's exactly how.
What You'll Build
By the end of this guide, you'll have a Swift iOS app that:
- Sends a prompt to an LLM (OpenAI or Anthropic)
- Receives and displays a streaming response in SwiftUI
- Keeps your provider API keys off the device
No backend server to write. Full logs in a dashboard.
Prerequisites:
- Xcode 15+
- An iOS 16+ target
- A free MAIG account (takes 2 minutes to create at maig.dev)
Step 1: Set Up Your MAIG Project (5 minutes)
Create a free account
Go to app.maig.dev and sign up. No credit card required for the free tier.
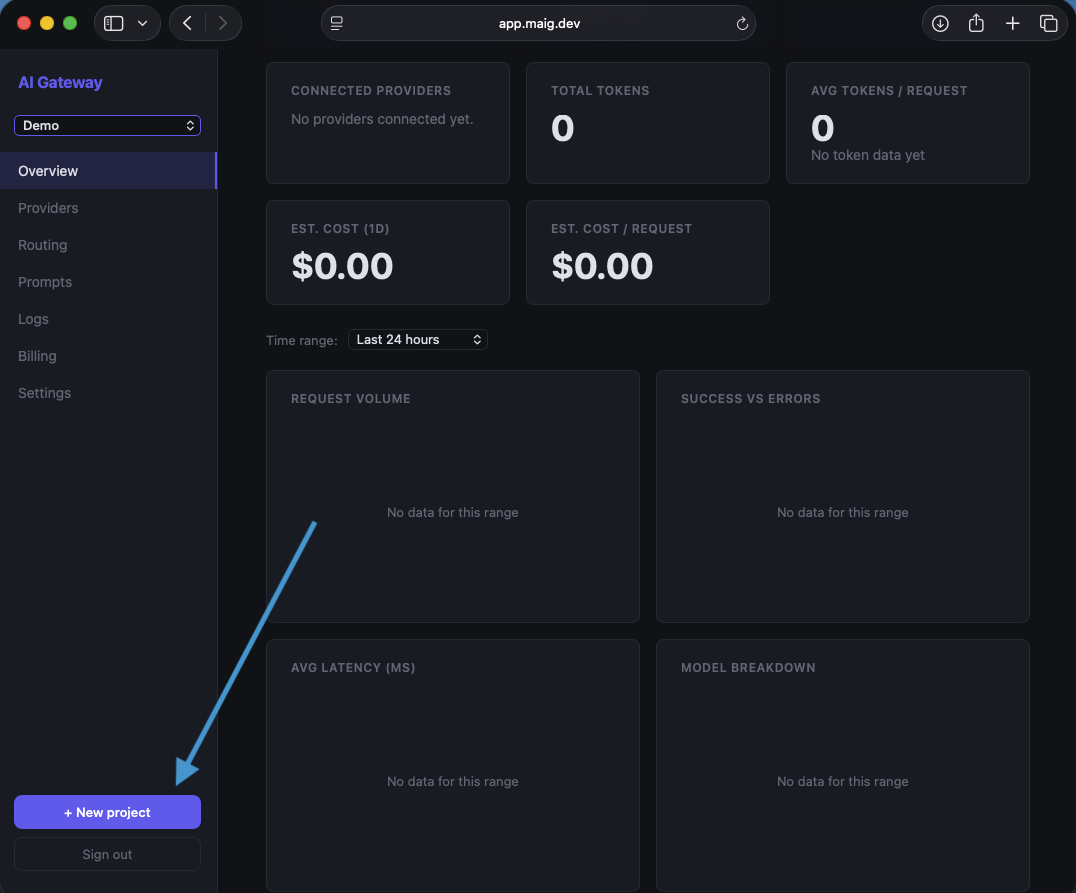
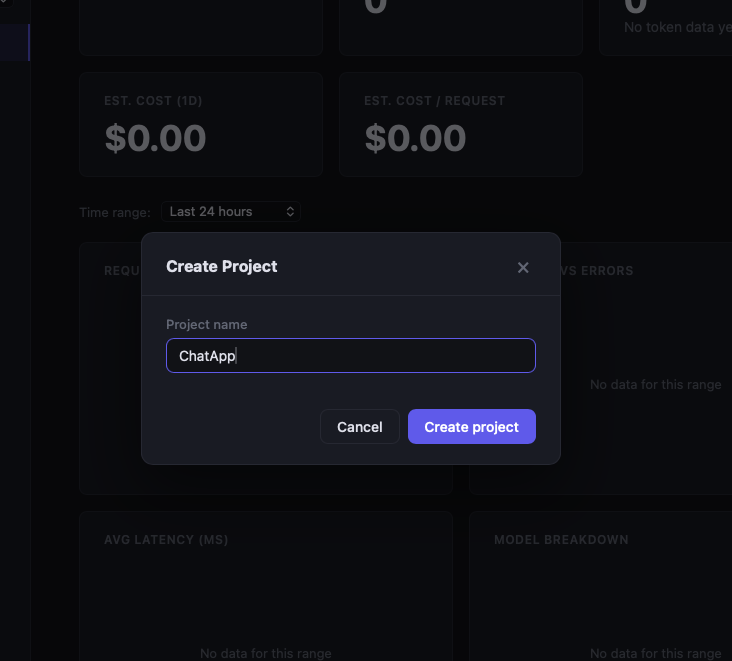
Create a project
Click New Project, give it a name (e.g., "My AI App"), and click Create.
Add your AI provider key
In the project settings, select Provider Keys and add your OpenAI key (or Anthropic key, or both). MAIG encrypts it immediately; you won't be able to read it back.
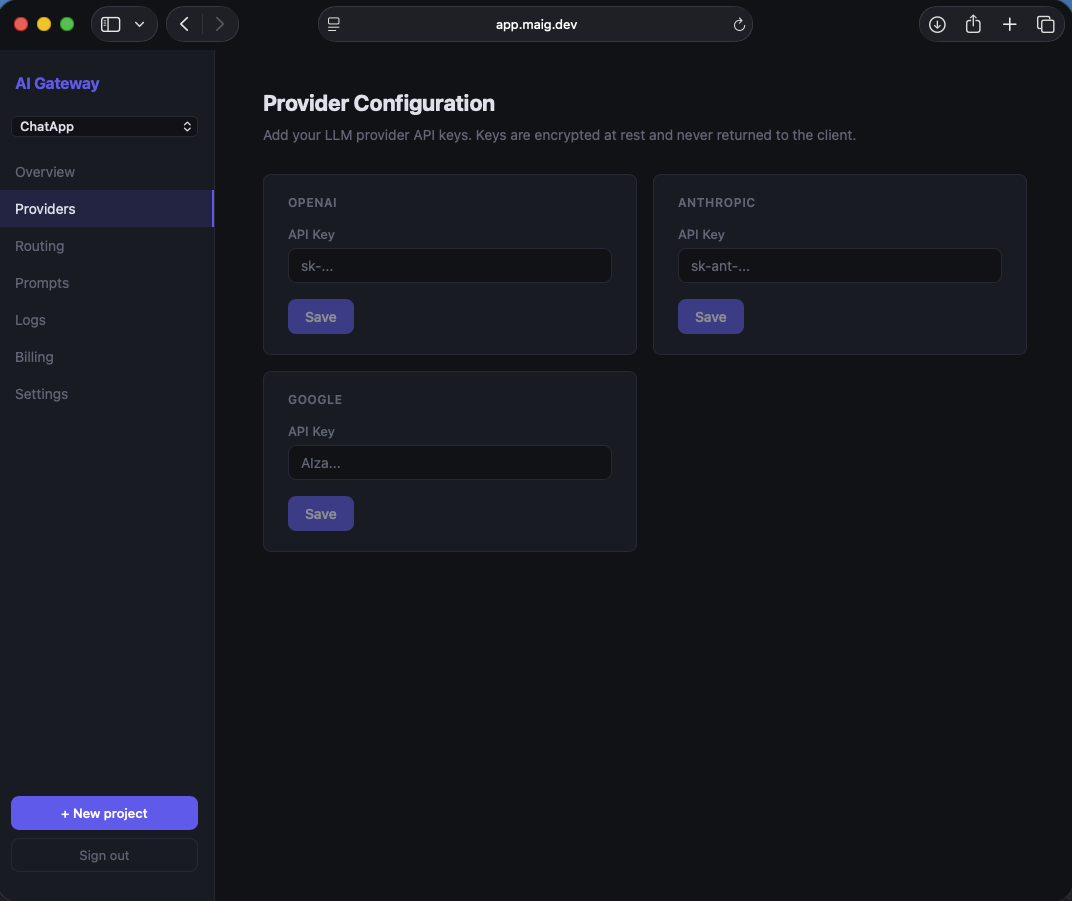
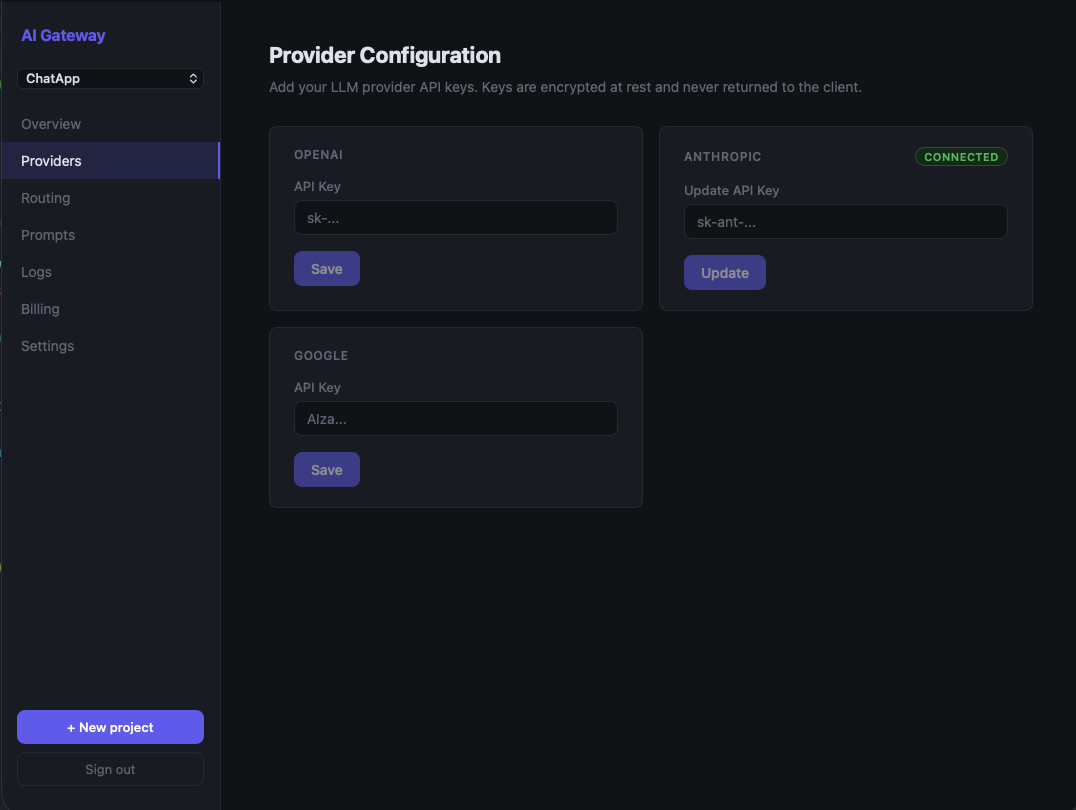
This is the last time your provider key appears anywhere near your app.
Copy your MAIG project key
Back on the project dashboard, copy the Project API Key — it starts with maig_live_. This is the only key that will go in your app, and it's scoped to your project with no direct LLM provider access.

Step 2: Install the Swift SDK (2 minutes)
Open your Xcode project, go to File → Add Package Dependencies, and enter:
https://github.com/MAiG-dev/maig-ios-sdk
Select Up to Next Major Version starting from 1.0.0 and click Add Package.
Alternatively, add it to your Package.swift:
dependencies: [
    .package(url: "https://github.com/MAiG-dev/maig-ios-sdk", from: "1.0.0"),
],
targets: [
    .target(
        name: "YourApp",
        dependencies: ["AIGatewaySDK"]
    )
]
Step 3: Configure the SDK (1 minute)
In your App entry point, create an AIGatewayClient with your project key and pass it to your views:
import SwiftUI
import AIGatewaySDK

@main
struct MyAIApp: App {
    let client = AIGatewayClient(apiKey: "maig_live_your_project_key_here")

    var body: some Scene {
        WindowGroup {
            ContentView(client: client)
        }
    }
}
That's all the setup. Your provider key is on MAIG's servers. Your app only knows its project key.
Step 4: Make Your First AI Call (3 minutes)
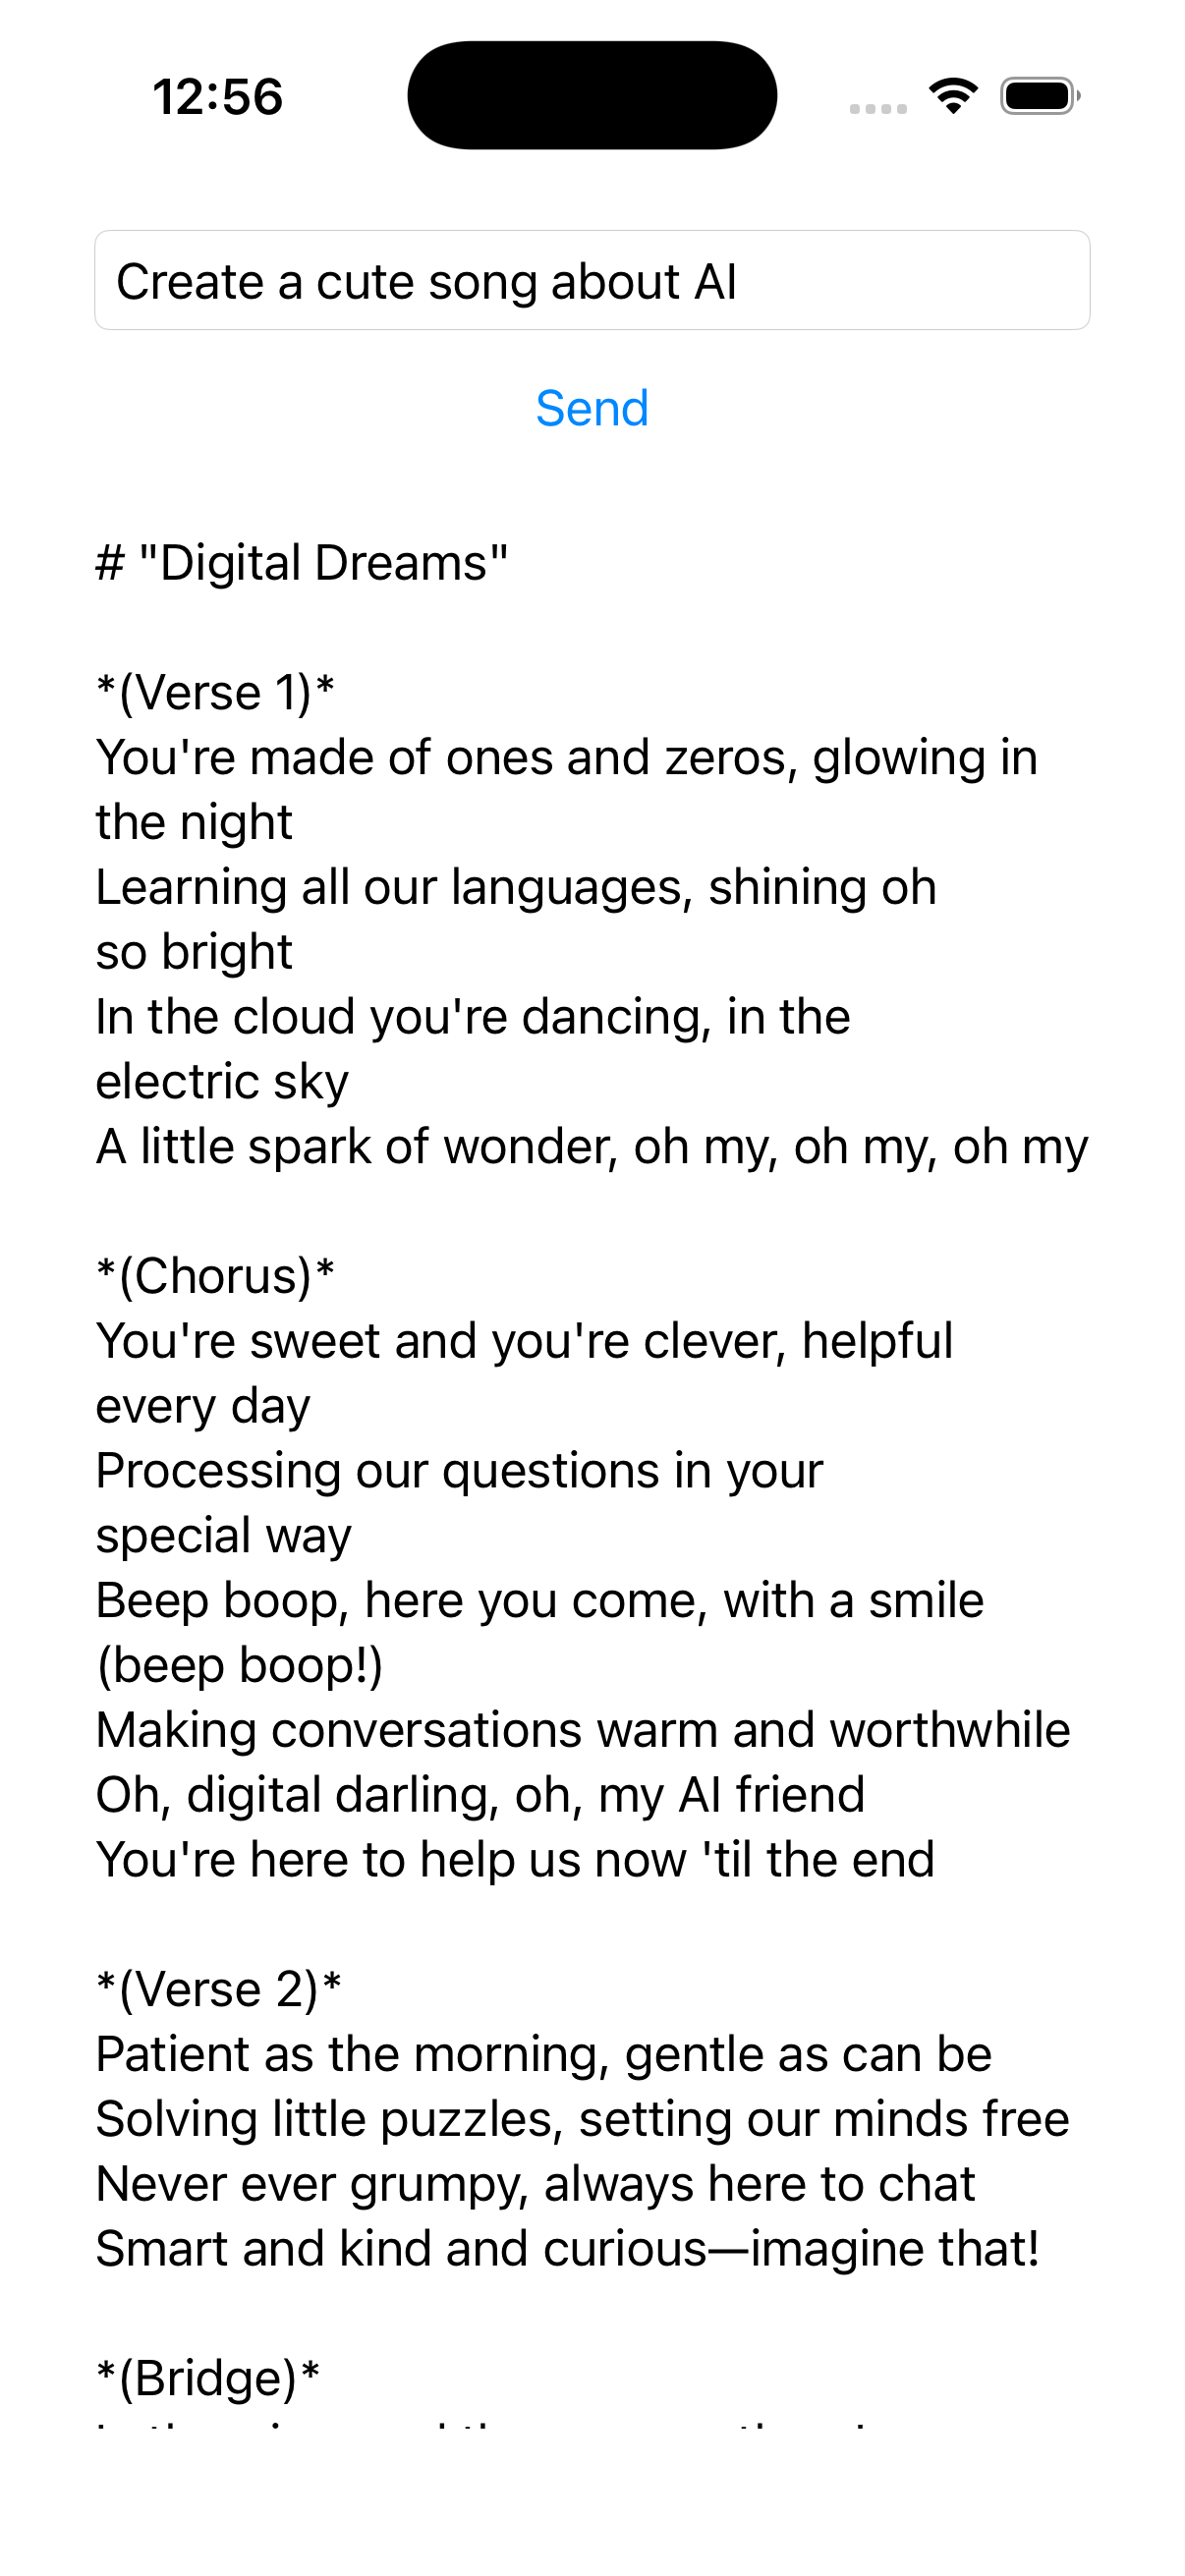
Here's a minimal SwiftUI view that sends a prompt and displays the response:
import SwiftUI
import AIGatewaySDK

struct ContentView: View {
    let client: AIGatewayClient
    @State private var prompt = ""
    @State private var response = ""
    @State private var isLoading = false

    var body: some View {
        VStack(spacing: 16) {
            TextField("Ask anything...", text: $prompt)
                .textFieldStyle(.roundedBorder)
                .padding(.horizontal)

            Button("Send") {
                Task { await sendPrompt() }
            }
            .disabled(prompt.isEmpty || isLoading)

            if isLoading {
                ProgressView()
            }

            ScrollView {
                Text(response)
                    .frame(maxWidth: .infinity, alignment: .leading)
                    .padding()
            }
        }
        .padding()
    }

    func sendPrompt() async {
        isLoading = true
        defer { isLoading = false }

        do {
            response = try await client.generateText(
                prompt: prompt,
                options: GenerateOptions(model: "auto")
            )
        } catch {
            response = "Error: \(error.localizedDescription)"
        }
    }
}
Run the app, type a prompt, and tap Send. Your response comes back through MAIG's gateway — no provider key in the binary, no backend you wrote.
Step 5: Add Streaming Responses (4 minutes)
Displaying the full response only after it completes feels slow. Streaming lets you show tokens as they arrive, which is dramatically better UX.
func sendStreamingPrompt() async {
    isLoading = true
    response = ""
    defer { isLoading = false }

    let stream = client.streamText(
        prompt: prompt,
        options: GenerateOptions(model: "auto")
    )

    for await chunk in stream {
        await MainActor.run {
            response += chunk
        }
    }
}
Update your button to call sendStreamingPrompt() instead. Now tokens appear as they're generated — the same typewriter effect you see in ChatGPT.
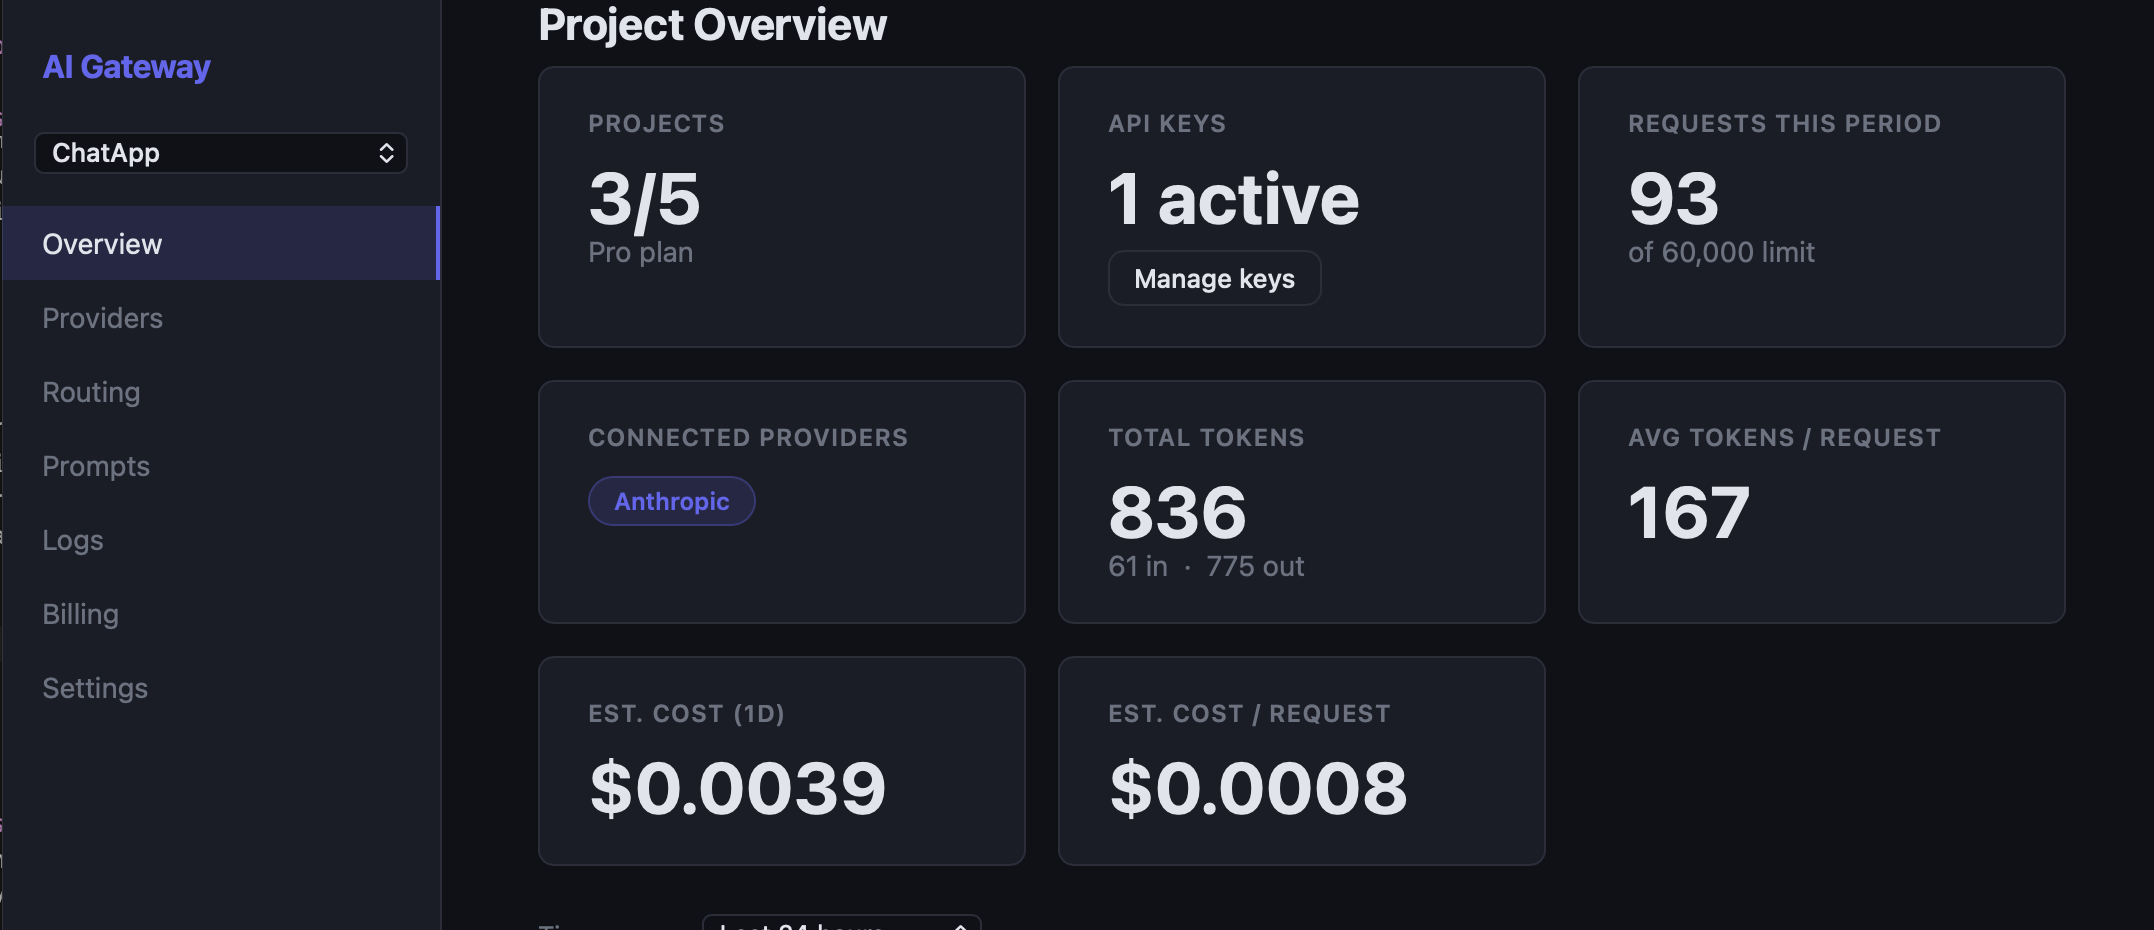
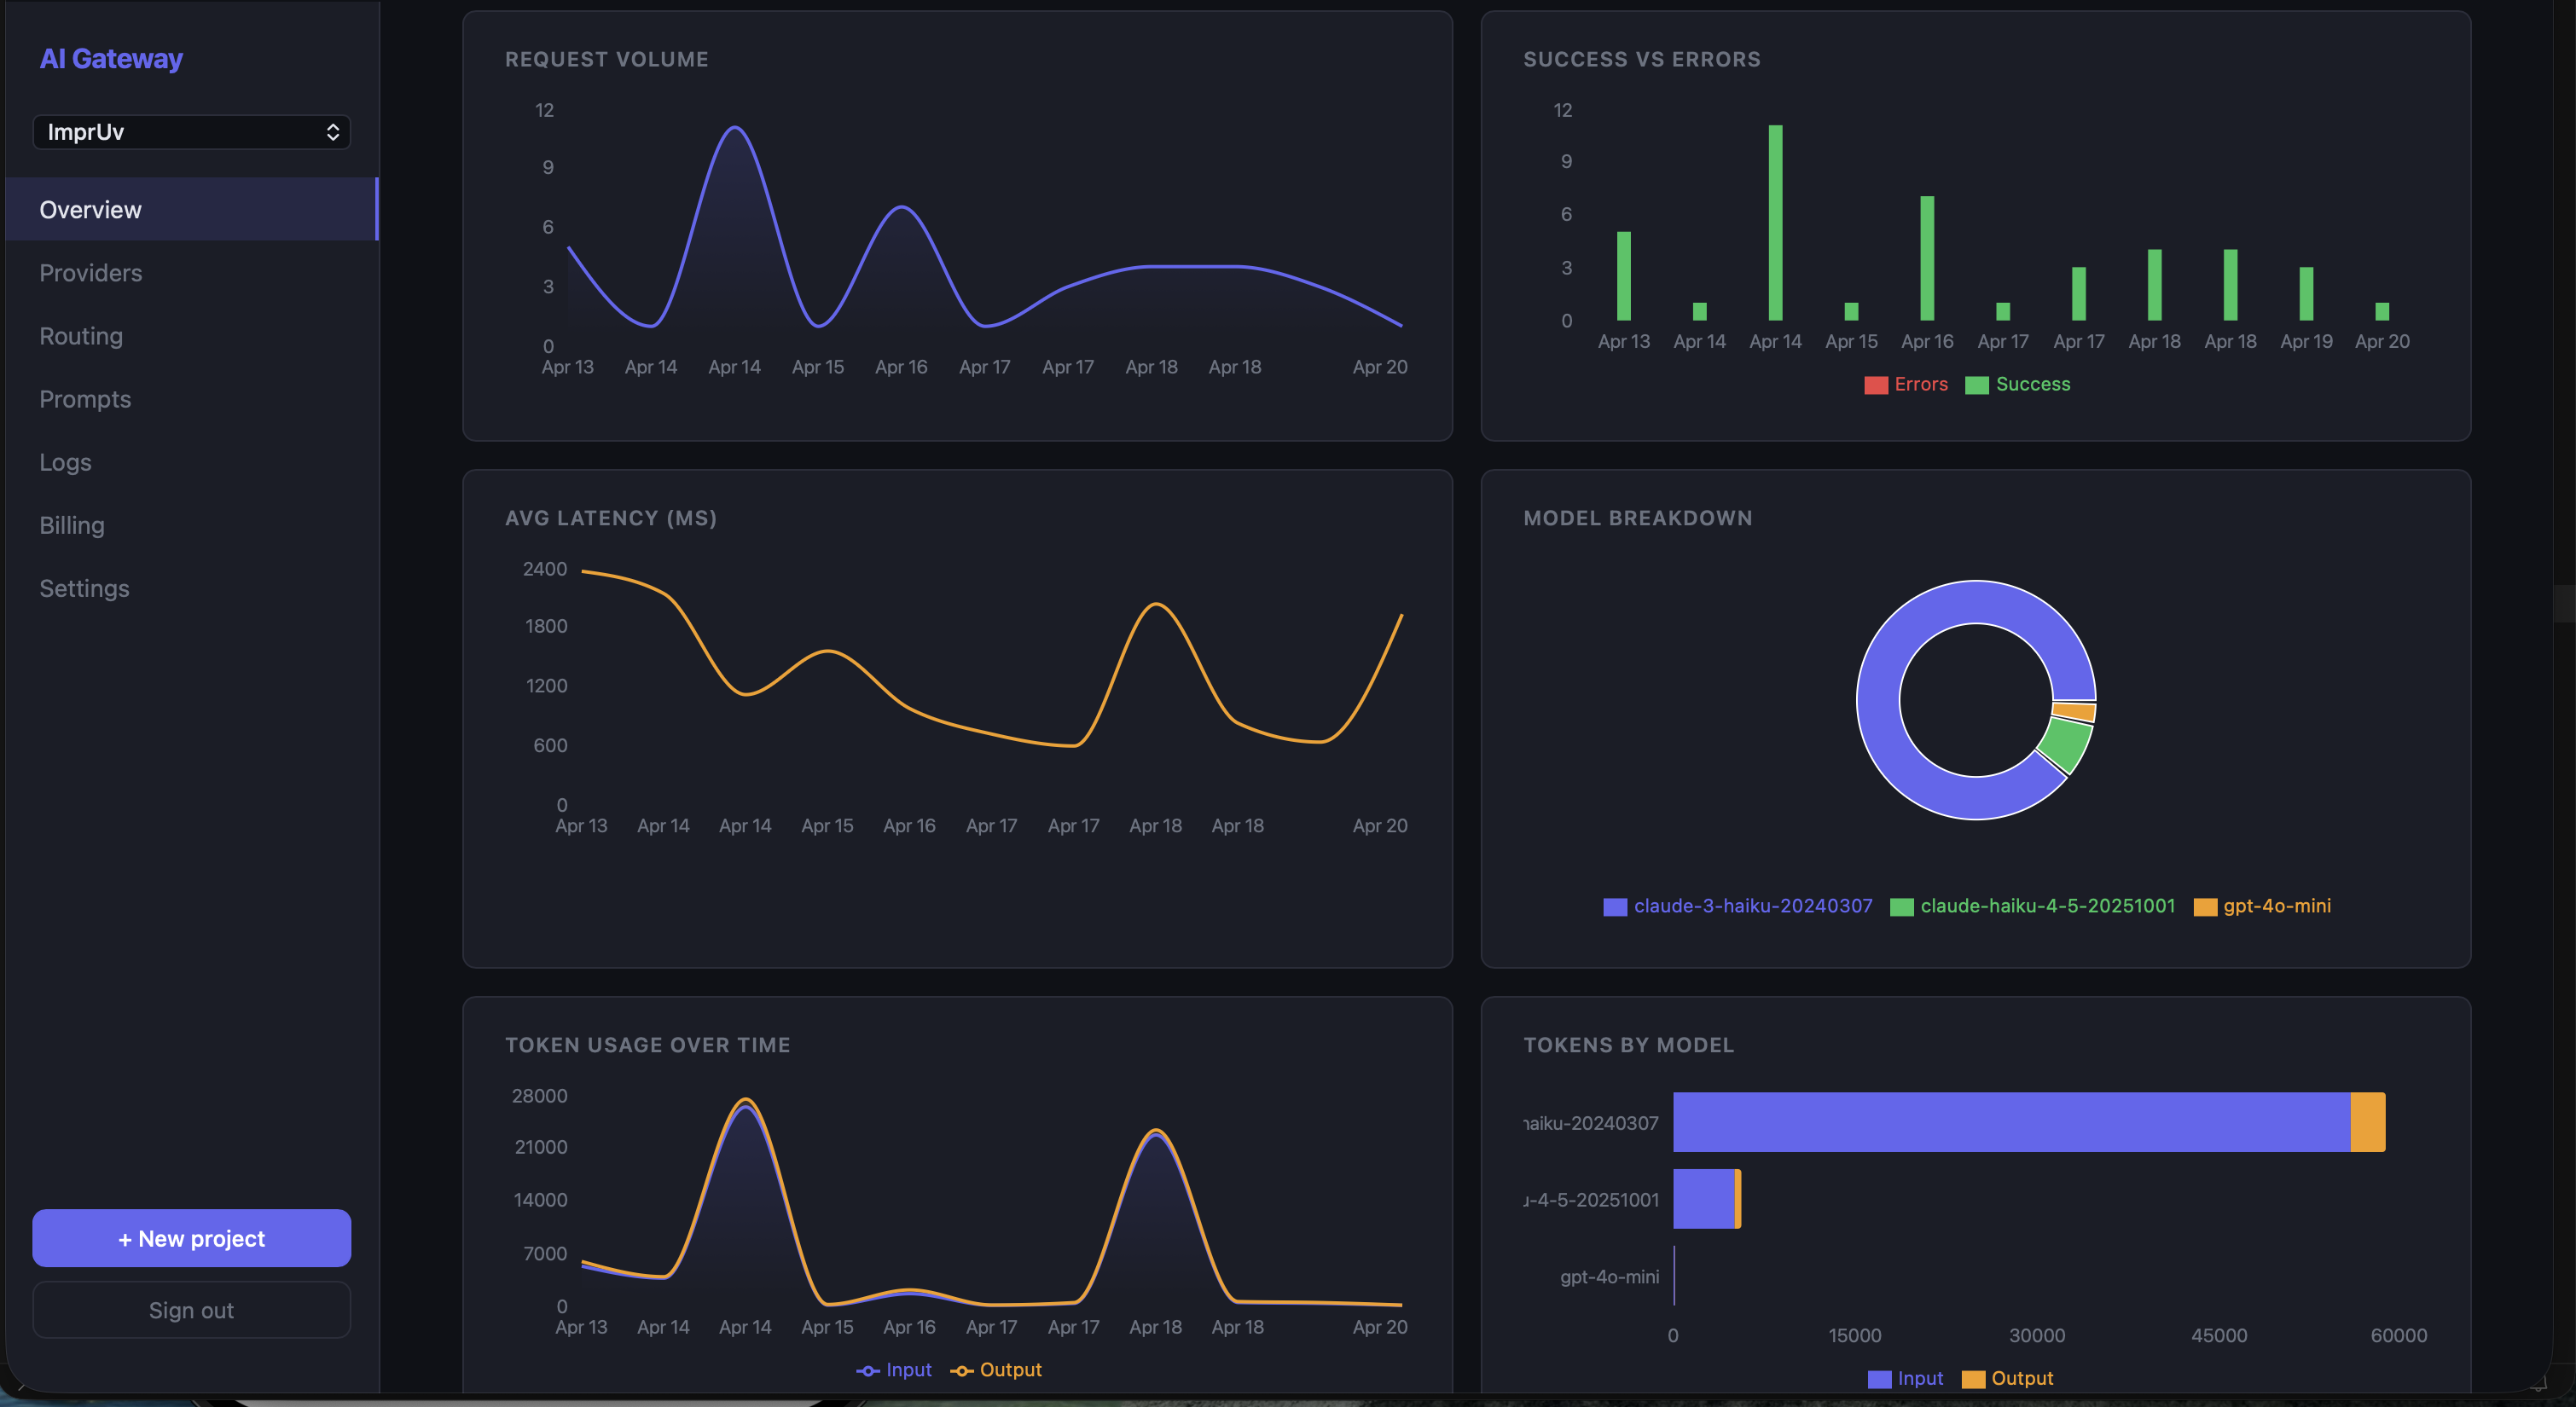
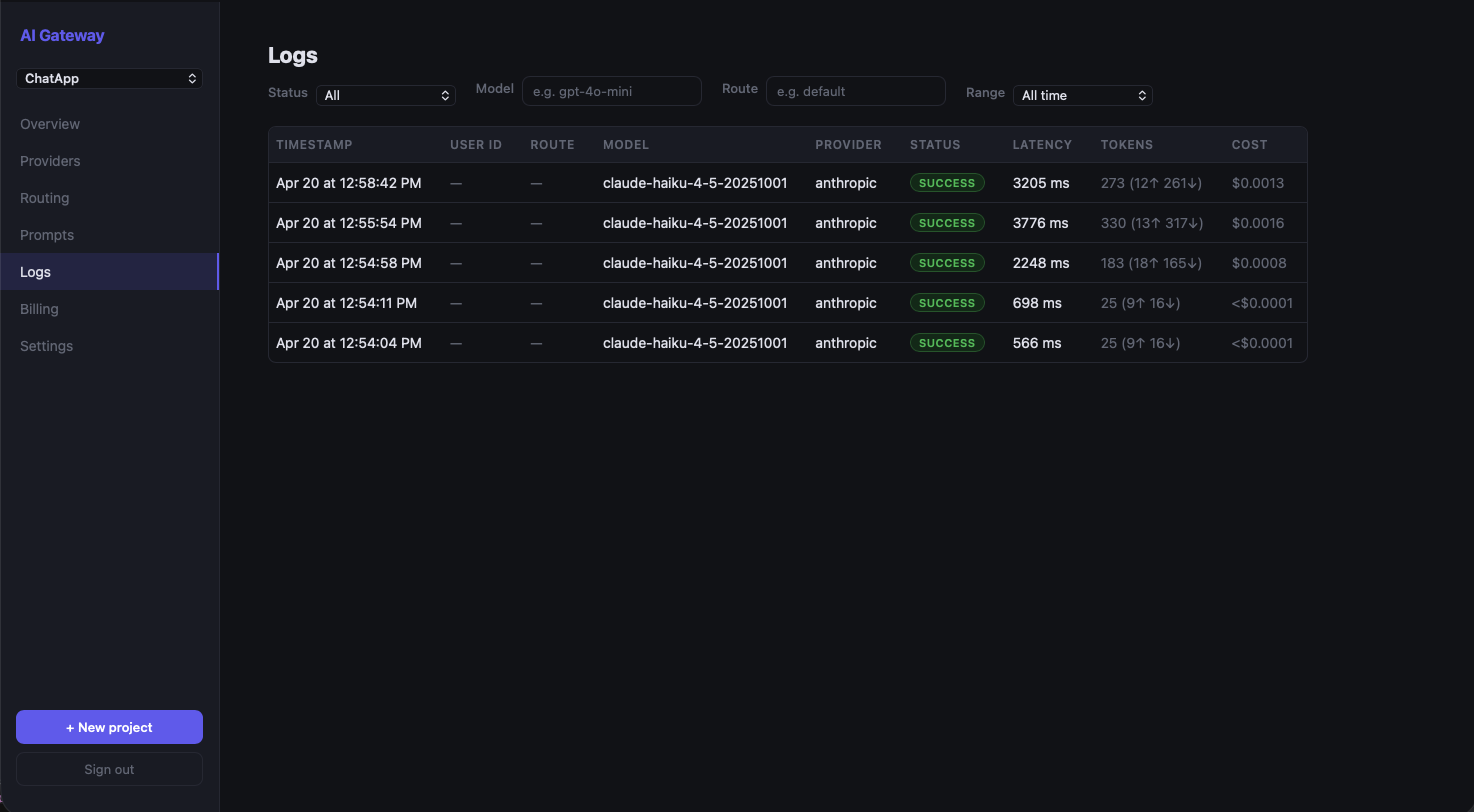
What's in the Dashboard
While you're building, open app.maig.dev and go to Logs. Every request you just made is there with:
- Timestamp
- Model used
- Latency (ms)
- Token count
- Status (success / error)
This is your operational visibility from day one. No extra instrumentation needed.
What's Next
Now that you have a working integration, a few things worth exploring:
Swap models without an app update. MAIG lets you configure named routes in the dashboard. Change the model your "gpt-4o" route points to without touching your code or shipping a new binary.
Add a fallback provider. Configure a secondary model (e.g., Claude 3.5 Sonnet) that automatically handles requests if your primary provider is down or rate-limited.
Switch to Anthropic. Change model: "gpt-4o" to model: "claude-3-5-sonnet" — MAIG routes to Anthropic automatically if you've added an Anthropic key in the dashboard.
Common Issues
Build error: module 'AIGatewaySDK' not found Make sure you added the package to the correct target, not just the project.
401 Unauthorized
Double-check that you copied the full project key from the MAIG dashboard and that it starts with maig_live_.
Response is nil Verify your provider key is correctly added in the MAIG dashboard. Go to Provider Keys and confirm the key is saved (you'll see a masked version).
Summary
In 15 minutes you:
- Created a MAIG project and added your OpenAI key (server-side, encrypted)
- Installed the Swift SDK via SPM
- Made a non-streaming API call
- Upgraded to streaming responses with
AsyncSequence - Got full request logs in the dashboard — for free
Your provider API key never touched the app binary.